In this guide, I’ll walk you through the settings and navigation of the ExoClick ad network dashboard. You’ll learn how to independently launch popunder, native ads, banners, push notifications, pre-rolls, and other formats to promote OnlyFans model pages.
Sign-Up and Getting Started
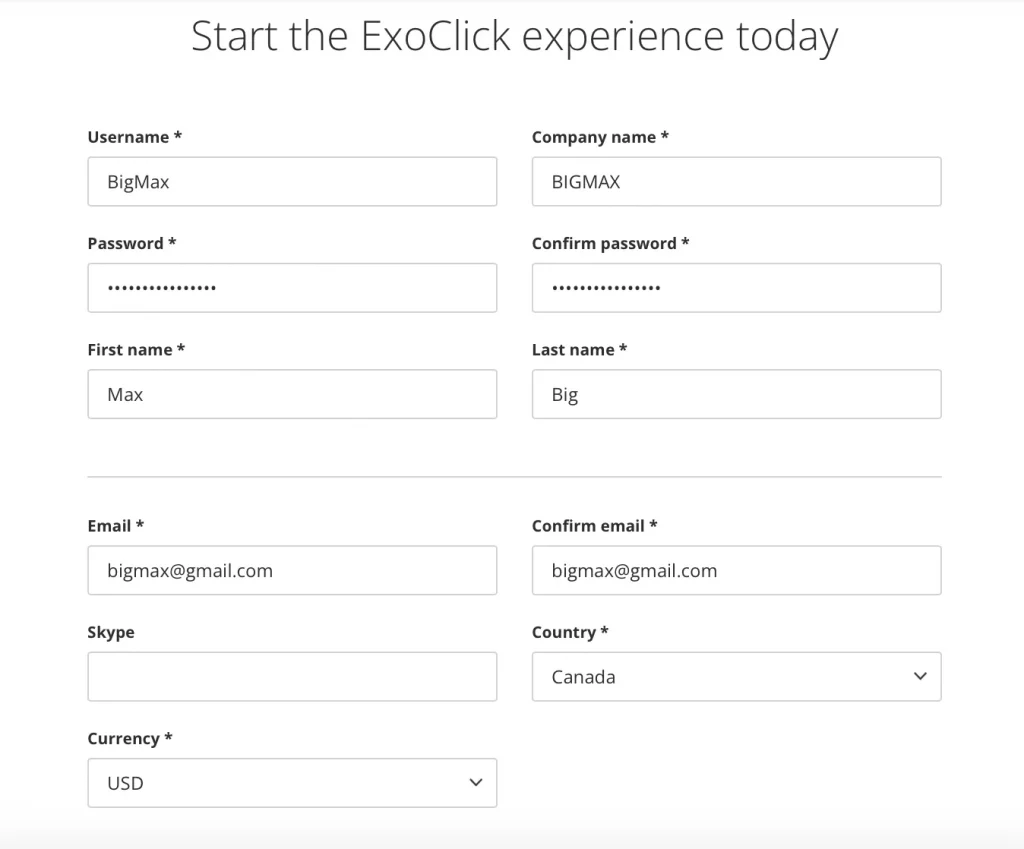
The first thing to do is register an account with exoclick.com. Fill out all the forms:
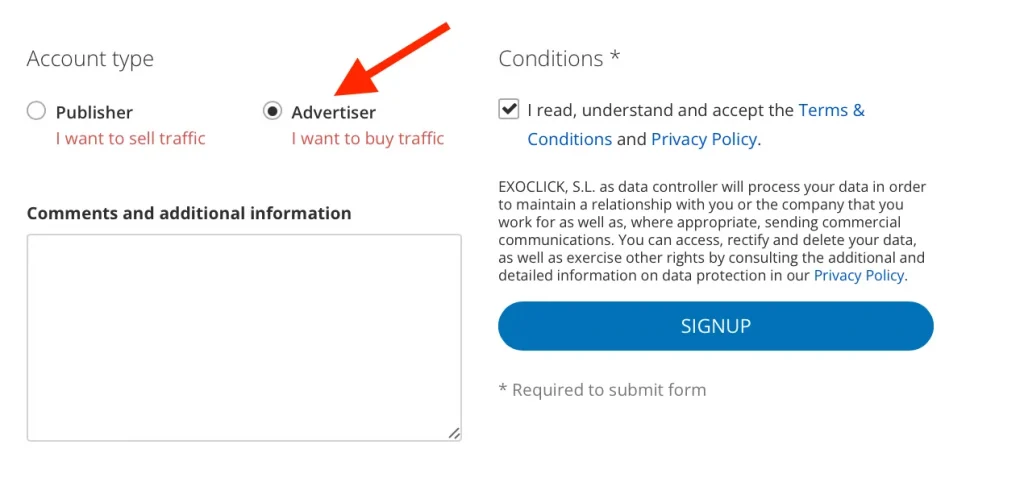
Below, select Advertiser and agree to the policy:
Confirm your account by mail:

Make sure you are in the advertiser’s office:

Next, you need to fill in the required information. I recommend selecting Russia, as other countries may add VAT to your payments. You can either generate a tax ID or find one online. Enter all the details and click “Update Account”:
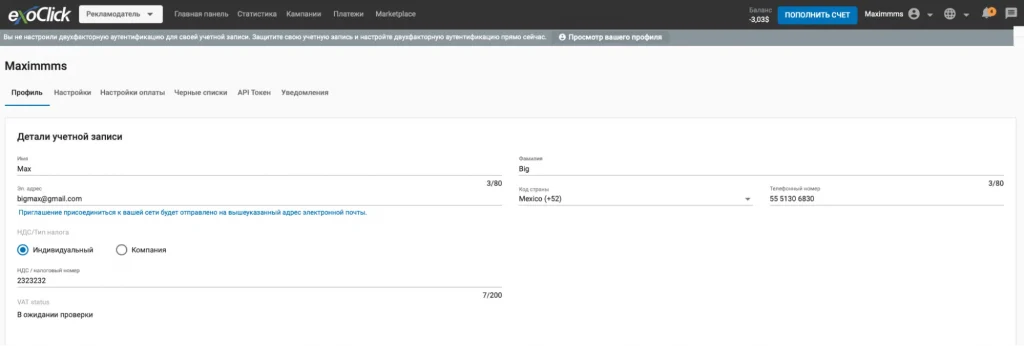
After that, wait for the account approval, which usually takes no more than an hour. Next, click “Add Funds”, enter your card details, and within a couple of minutes, the funds will appear in your account.
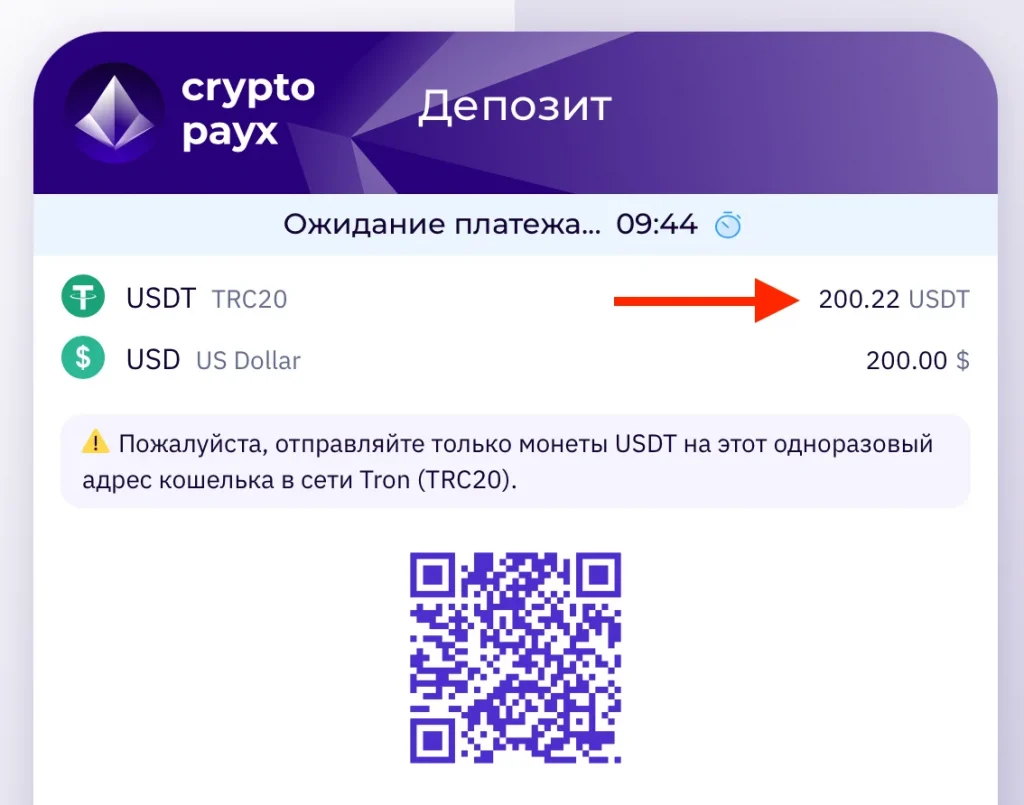
IMPORTANT: If you’re paying with crypto, make sure to enter the full amount down to the last cent, including all fees. Otherwise, it may be difficult to recover the funds, and this can only be resolved through support.
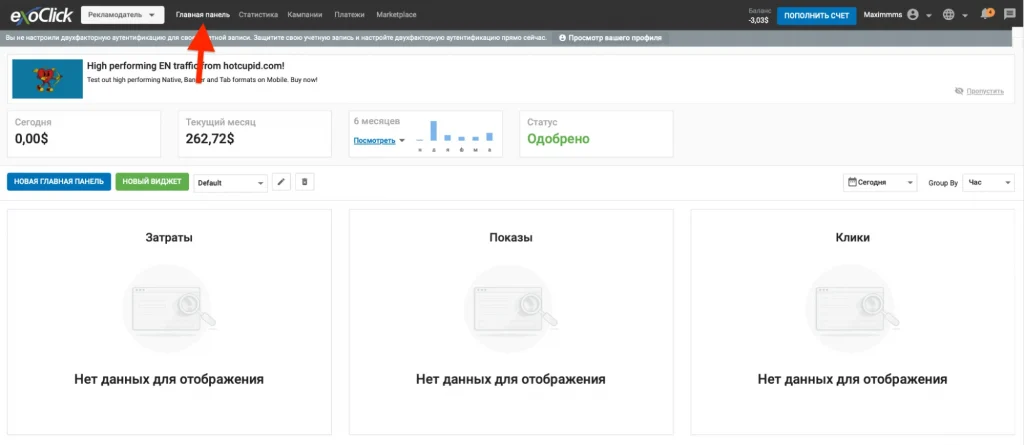
The main panel is a dashboard with key information, including costs, impressions, and clicks from all your campaigns:
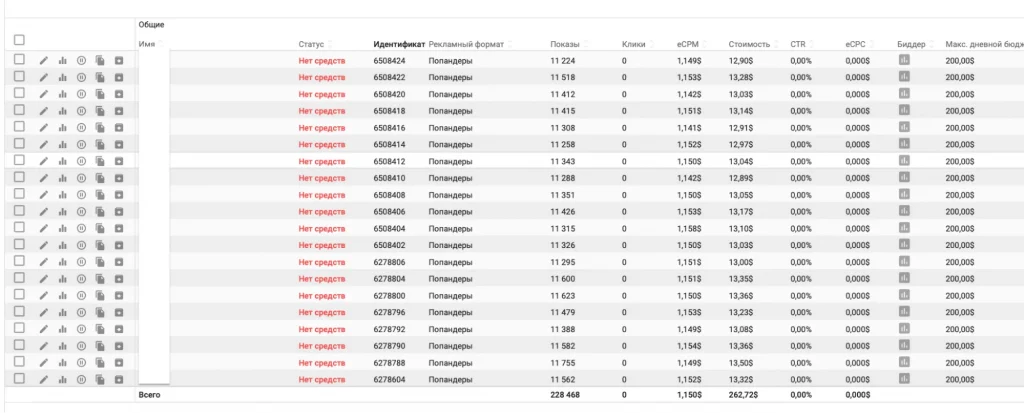
The “Campaigns” tab displays statistics for all your campaigns, including expenses, impressions/clicks, and the ad format:
The “Marketplace” tab contains all the traffic sources you can use. If you plan to send traffic to OnlyFans or another adult resource, select the “Adult” category in the tab and click “Apply.” This will filter out irrelevant sources and simplify the moderation process:
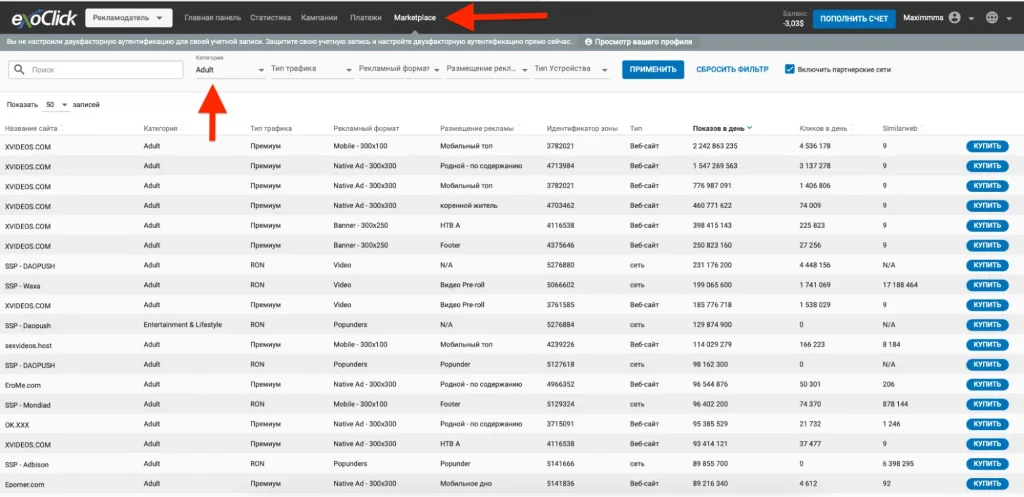
Currently, the ad network offers over 130,000 variations for running ads in the adult niche, including different resources and formats. You can run any format to suit your needs.
Launching a Campaign for a Broad Audience
In this case, we won’t target a specific resource or website but will launch a campaign across all available options based on the parameters we need.
Go to the “Campaigns” tab and click “New Campaign:”

Select the “Adult” category and choose the appropriate model parameters from the list:

By selecting categories that match your model, you increase the likelihood of converting viewers into subscribers. For example, if your model is Asian, using the correct tag will ensure her ads are shown to fans of that category.
Choose at least three categories: selecting only one will result in a very narrow audience. While this isn’t an issue, it will slow down the ad delivery process.
Next, you need to choose an ad format. For this example, I’ll use a popunder. You can select “All” or “Mobile Popunder.” Additionally, on the right side during campaign setup, you’ll be able to see the size of your audience. At first, the audience will be very broad, but further adjustments will narrow it down:

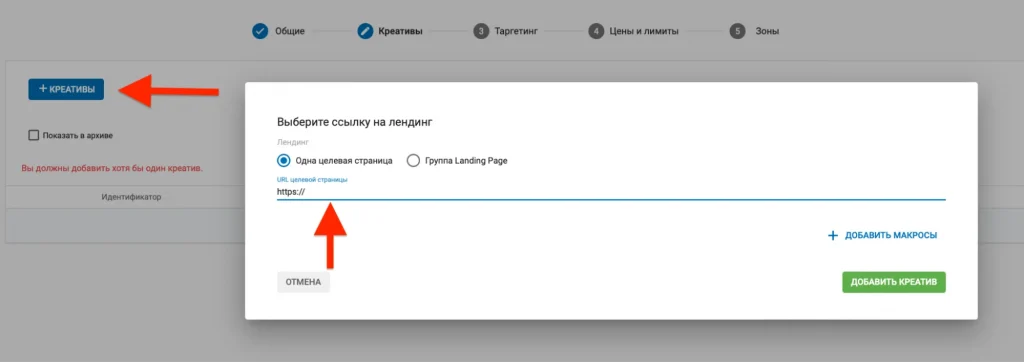
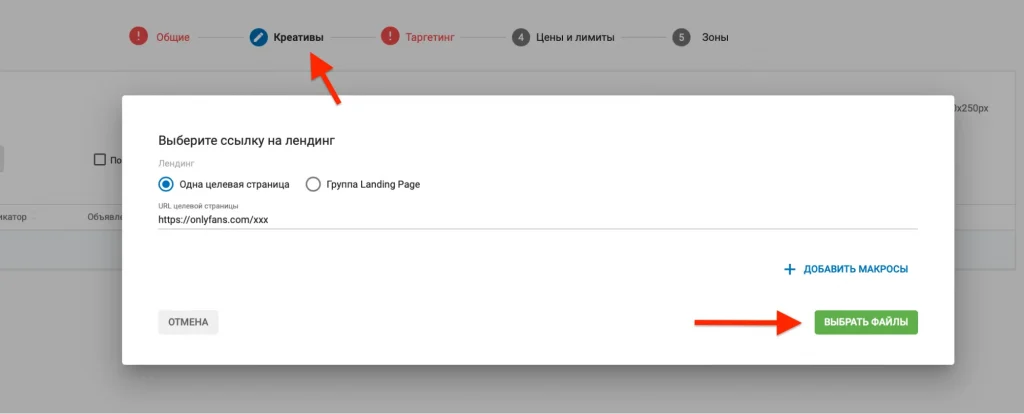
Next, go to the “Creatives” tab. If you’re running a popunder format, only a link is used for the creative. Insert the link and move on to the next step:
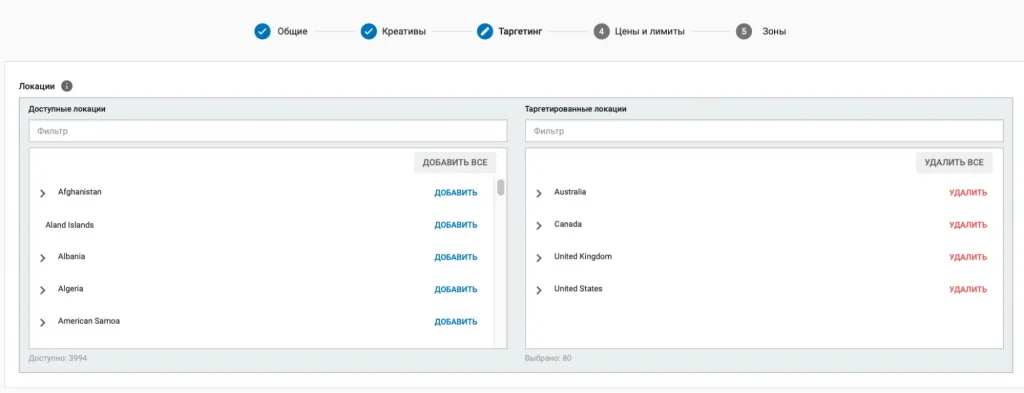
Targeting is the most important part of your campaign settings. The first step is selecting a country. I recommend choosing only Tier-1 countries. You can keep the countries I’ve selected or add more European countries:
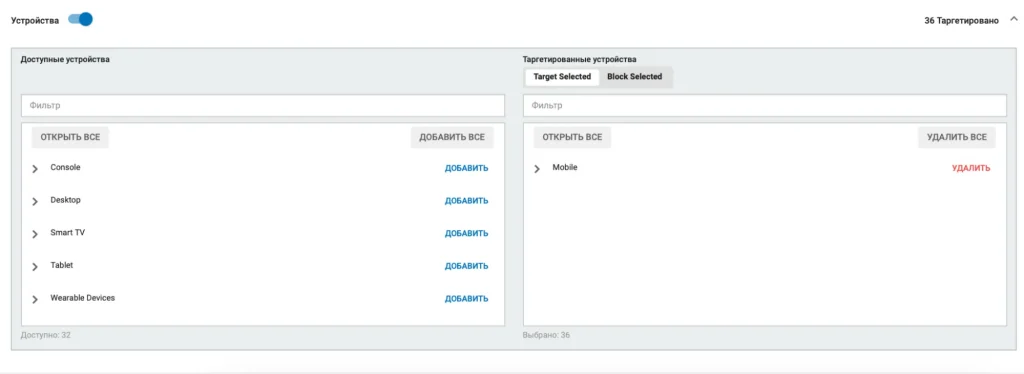
The next tab is “Devices.” If I’m directing traffic to OnlyFans, I select mobile devices only, as the majority of OnlyFans users access the platform through them:
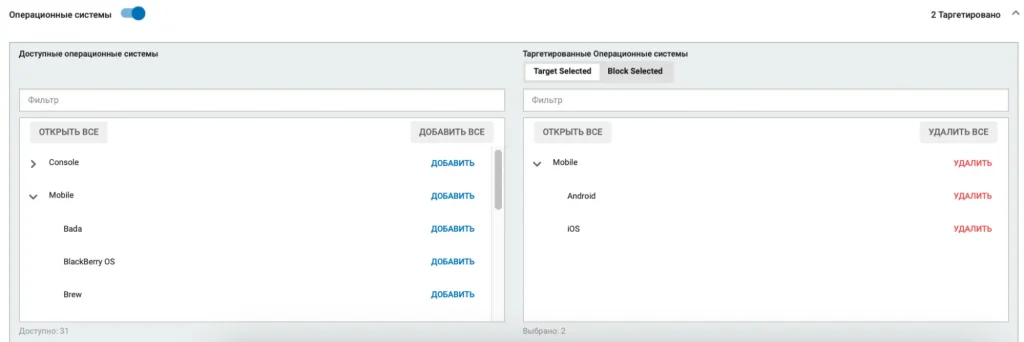
Operating Systems: I stick to Android and iOS. There’s no point in including other OS options:
For “Language,” select English if you’ve chosen countries with English-speaking populations. Otherwise, you may attract users from other undesirable countries using VPNs, such as Indians browsing with a US-based VPN:

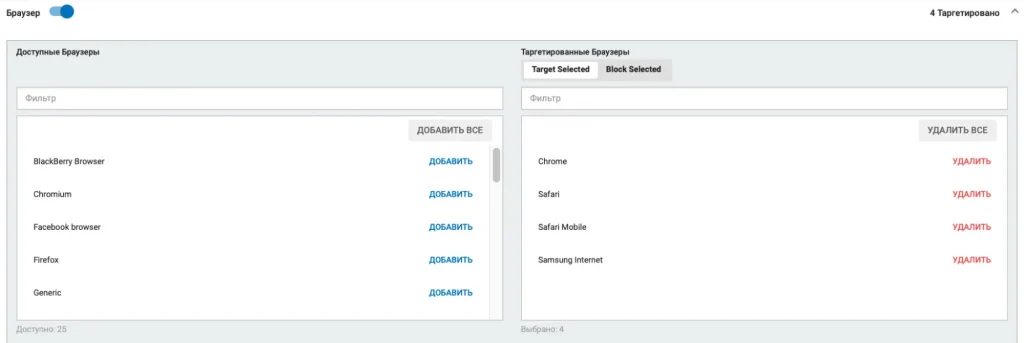
In “Browsers,” you need to include at least Chrome and Safari Mobile if you selected Android and iOS as your operating systems:
The next important setting is “Keywords.” I use the keyword “OnlyFans,” which allows me to acquire fans for $0.25–$0.50. You can experiment and add your own keywords as well:

After completing all the targeting settings, the audience has significantly narrowed, but it’s sufficient for the ads to perform effectively:
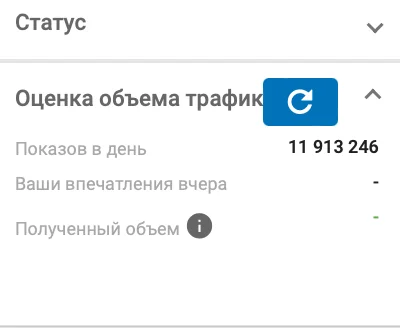
In “Pricing and Limits,” make sure to select CPM — the cost per 1,000 impressions:

IMPORTANT: If you’re using keywords like “OnlyFans,” a bid of $1–$2 per 1,000 impressions is optimal, as you’ll be competing with other advertisers in the ad auction for impressions.
If you’re not using any keywords, your audience will be broader, competition lower, and you can start with a bid of $0.2–$0.5. At a $2 bid, your deposit will run out within 10–15 minutes, and the cost per fan will exceed $3–$4.
If your ads don’t receive impressions after launch, you can gradually increase your bid by a few cents with increments of $0.1.
The “Frequency Cap” setting allows you to limit how often your ad is shown to the same user. I usually set it to 2 impressions per 24 hours.
“Daily Limits” can prevent you from burning through your entire budget in case of an error. The minimum budget is $20. I recommend using this feature when testing multiple campaigns to distribute your budget evenly:

Click the “Create” button and wait for moderation. You can view your campaign and its status in the “Campaigns” tab. Moderation typically takes no more than 1–2 hours.
Different Resources for Different Formats
Above, we launched a single ad format across all available sources, but you can target specific ones instead. This approach allows you to find highly profitable sources and focus your traffic solely on them.
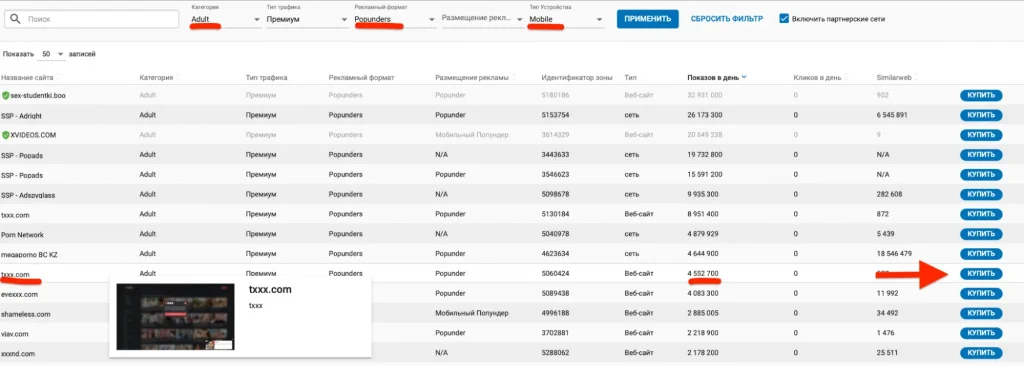
Go to the “Marketplace” tab, select the “Adult” category, and choose the traffic type: either “Premium” or RON (Run-of-Network). The latter is lower in quality but much cheaper. I recommend testing it as well. Set the device type to Mobile.
A list of websites matching your parameters will appear. You can manually review each site and check the daily traffic volume in the “Daily Impressions” column. Once you’ve chosen a suitable source, click “Buy,” and you’ll be directed to the same settings as at the beginning. The only difference is that you’ll configure targeting specifically for this resource:
This way, you can launch any ad format: banners, native ads, or video ads. You can target a broad audience across all resources or select and test individual ones in the marketplace.
To upload video, banners, or other ad formats, you need to provide a file that matches the ad format and proceed with the setup:
The settings described above are still delivering fans at $0.2–$0.5 through popunder traffic.
My Test Results
RON Traffic: Spent approximately $2:

Pop-under traffic:
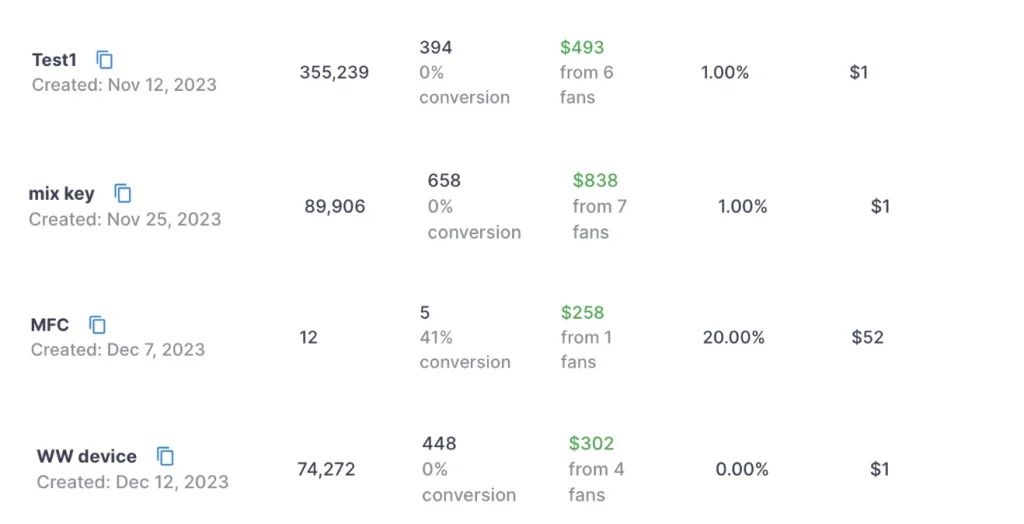
Of course, some tests were unprofitable.
Helpful Tips
- If you’ve launched a campaign with a low bid and find the traffic insufficient, you can increase the volume simply by duplicating the campaign. Select it and duplicate it 5–10 times. This way, you’ll get more traffic without raising your bid:

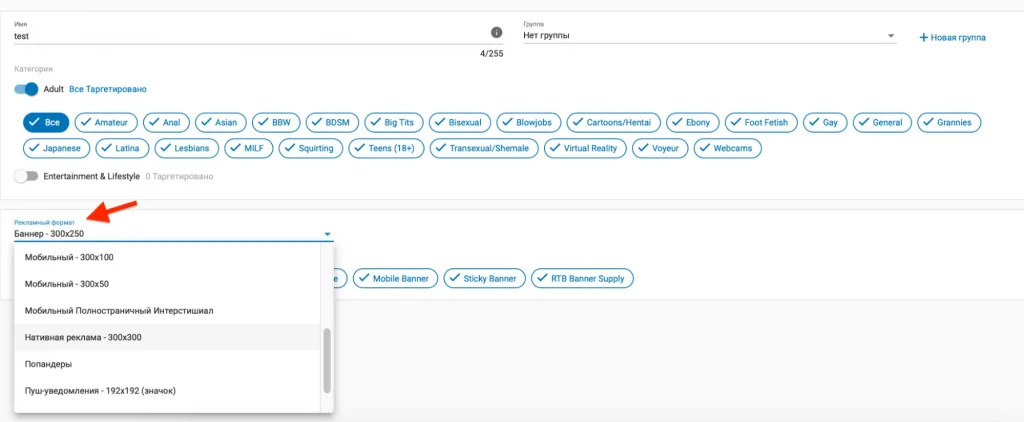
- Test different formats. In addition to popunders, you can launch banners or videos with a call-to-action. As a reminder, you can select the ad format here:
- When driving traffic to OnlyFans, avoid using landing/pre-landing pages. Extensive testing has shown that they yield no results. Direct the traffic straight to the free or FTL link.
- If you’re targeting the US, run your campaigns primarily during the evening or daytime in that region.

I have been working in advertising and digital marketing since 2015. I started with e-commerce affiliate programs and later moved into the Dating vertical, where I gained extensive experience in traffic acquisition and monetization.
For the past four years, I have specialized in the OnlyFans niche: testing traffic sources, analyzing audience behavior across different social platforms, and collaborating with creators to help them build effective funnels and increase their revenue.
I also run my own Telegram channel where I share practical case studies, growth strategies, and performance insights.
